In this guide, we’ll provide step-by-step instructions on how to create a listing on Vrbo!
Vrbo is one of the leading online marketplaces for the vacation rental industry, with sites representing more than 2 million online bookable vacation rental homes in 190 countries, and is a part of the Expedia family of brands.
Although there are different sign-up & log-in screens for Travelers and Owners on Vrbo, if you already created an account as a Traveler, you can use those credentials (email/password) to log in and then follow the links to proceed with the listing of your property as an Owner. Similarly, if don’t have an account on Vrbo, you can sign-up as an Owner in order to list your property and use the same credentials in the future as a Traveler and book a place.
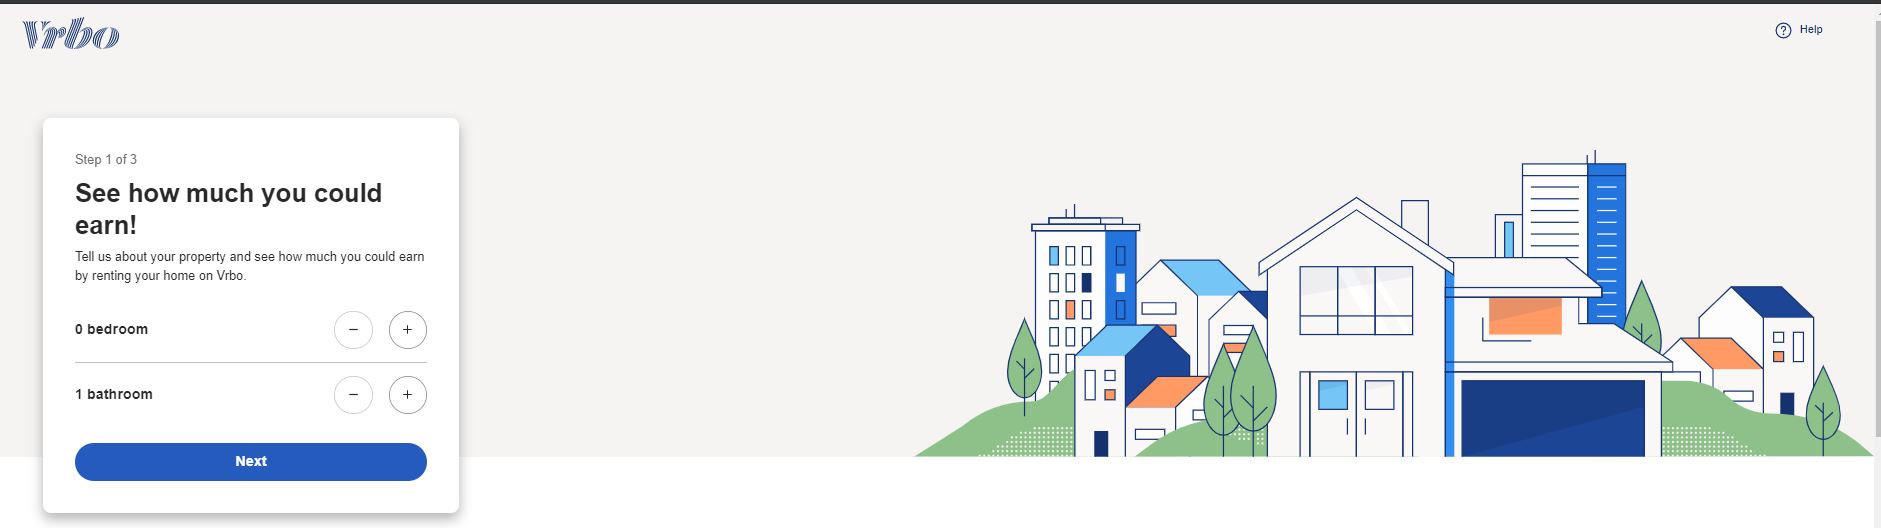
First, start with the basics by entering the number of bedrooms and bathrooms.
Next, you will be prompted to enter the address of your place.

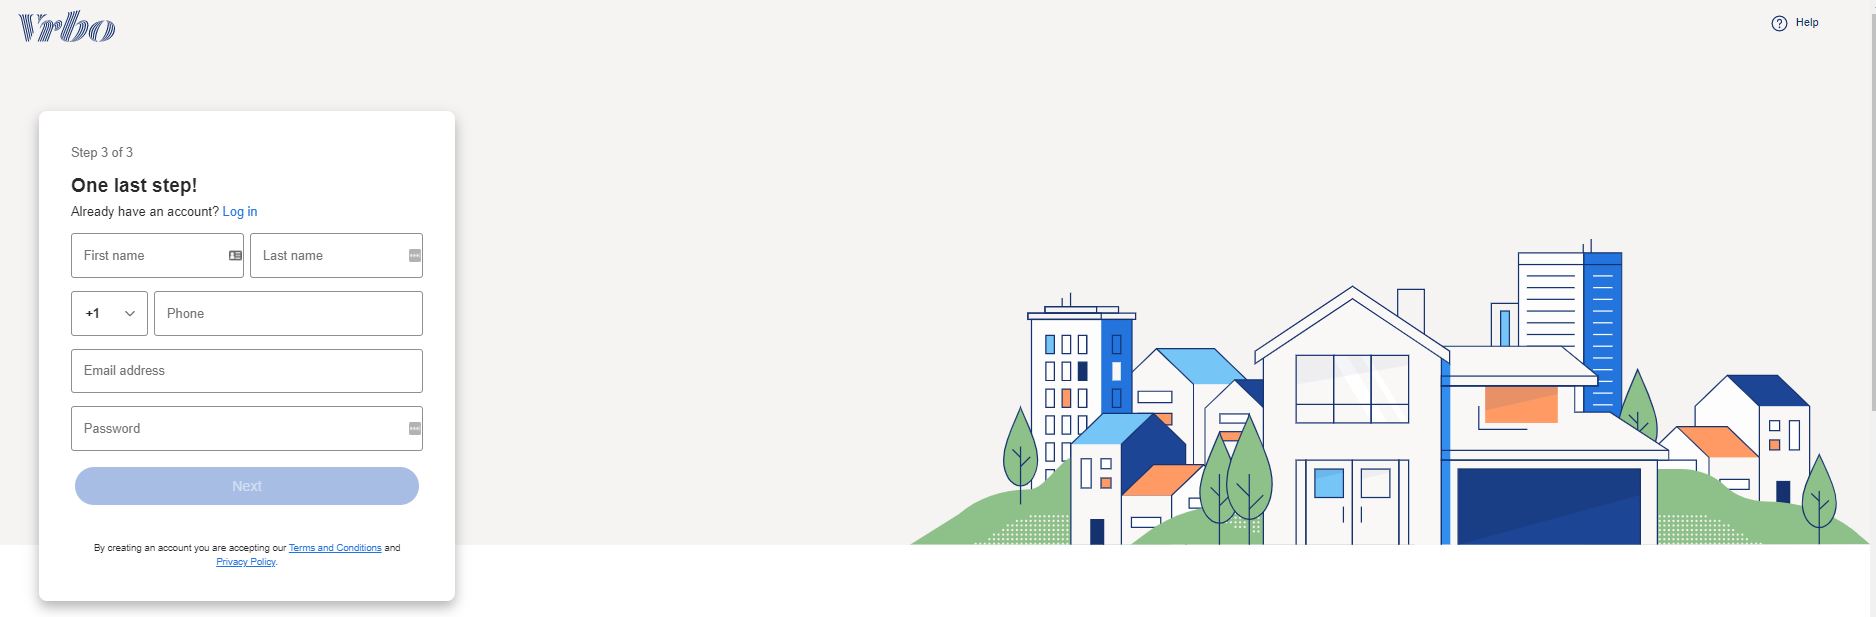
The next piece of information that you need to enter in order to create an Owner account is your e-mail, name, phone number, and, of course, a password.
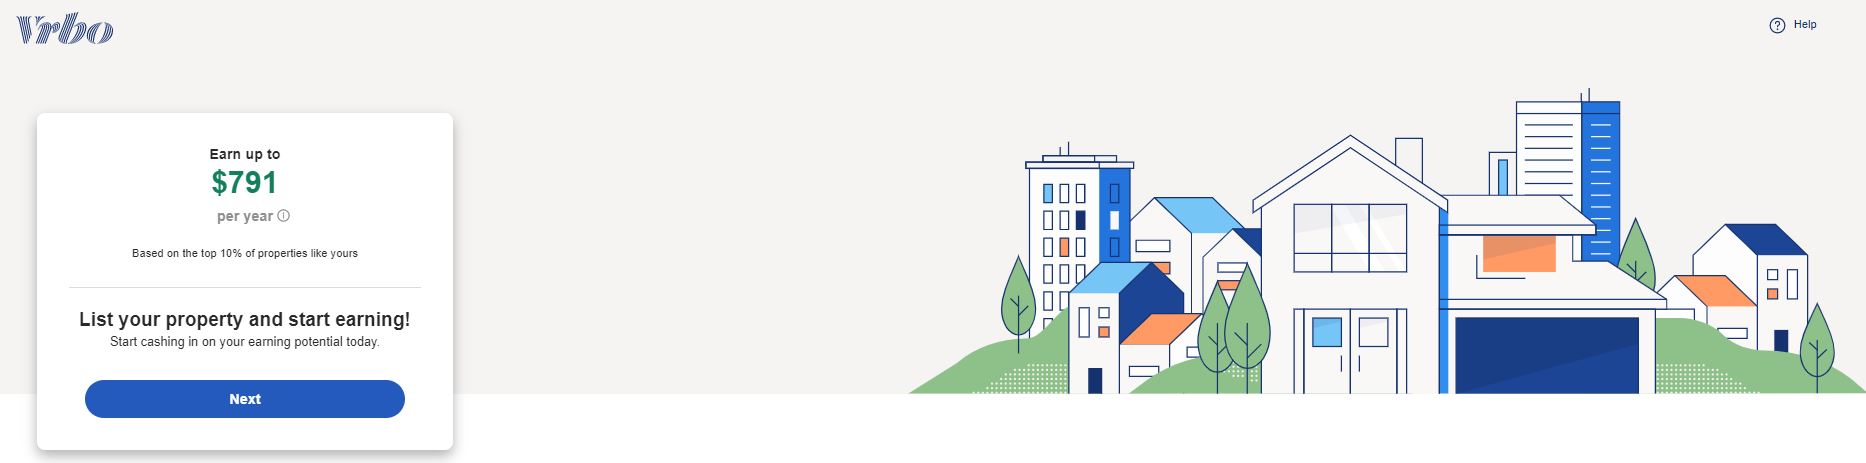
Once you have created the account, Vrbo will show your earning potential based on similar places (same area and size) with 75% occupancy.
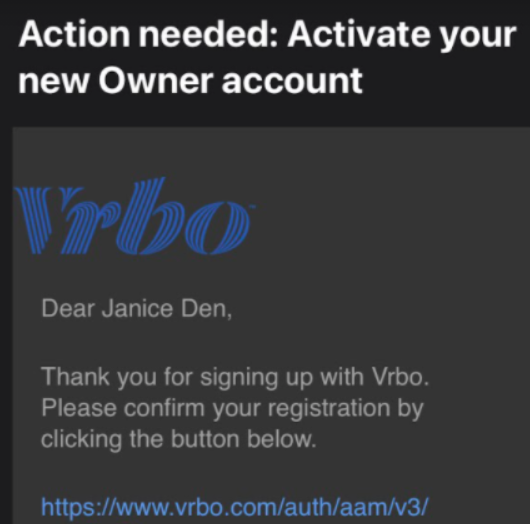
 You will receive an e-mail to confirm your registration and proceed with the next steps in order to list your place.
STEP 1: Where is your rental located?
You already filled out this information, you just need to verify that it’s correct.
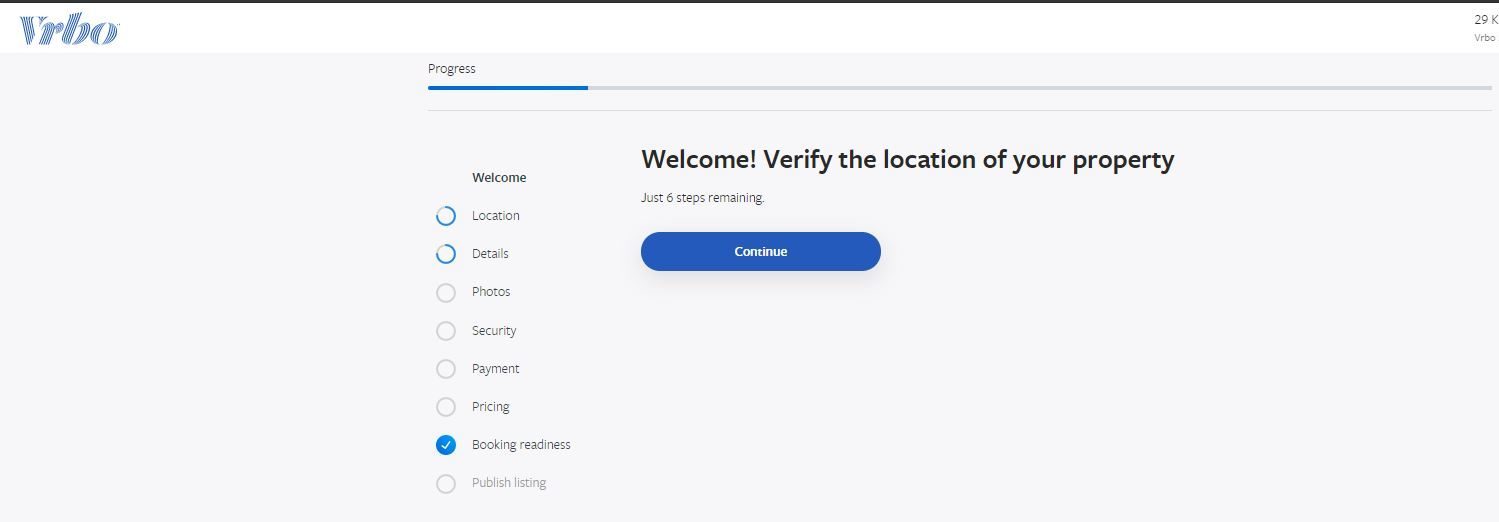
Pin the exact location of your place, you’ll have the option to show it once the reservation is confirmed.

STEP 2: More information about your property
As you already filled out the basic information about your place (i.e. the number of bedrooms, bathrooms, and how many people it can accommodate) you now need to go into a little more detail in order to describe your property.
- Headline (up to 80 characters)
- Property description (up to 1,000 characters)
- Property type
- Bedrooms
- Accommodates
- Bathrooms
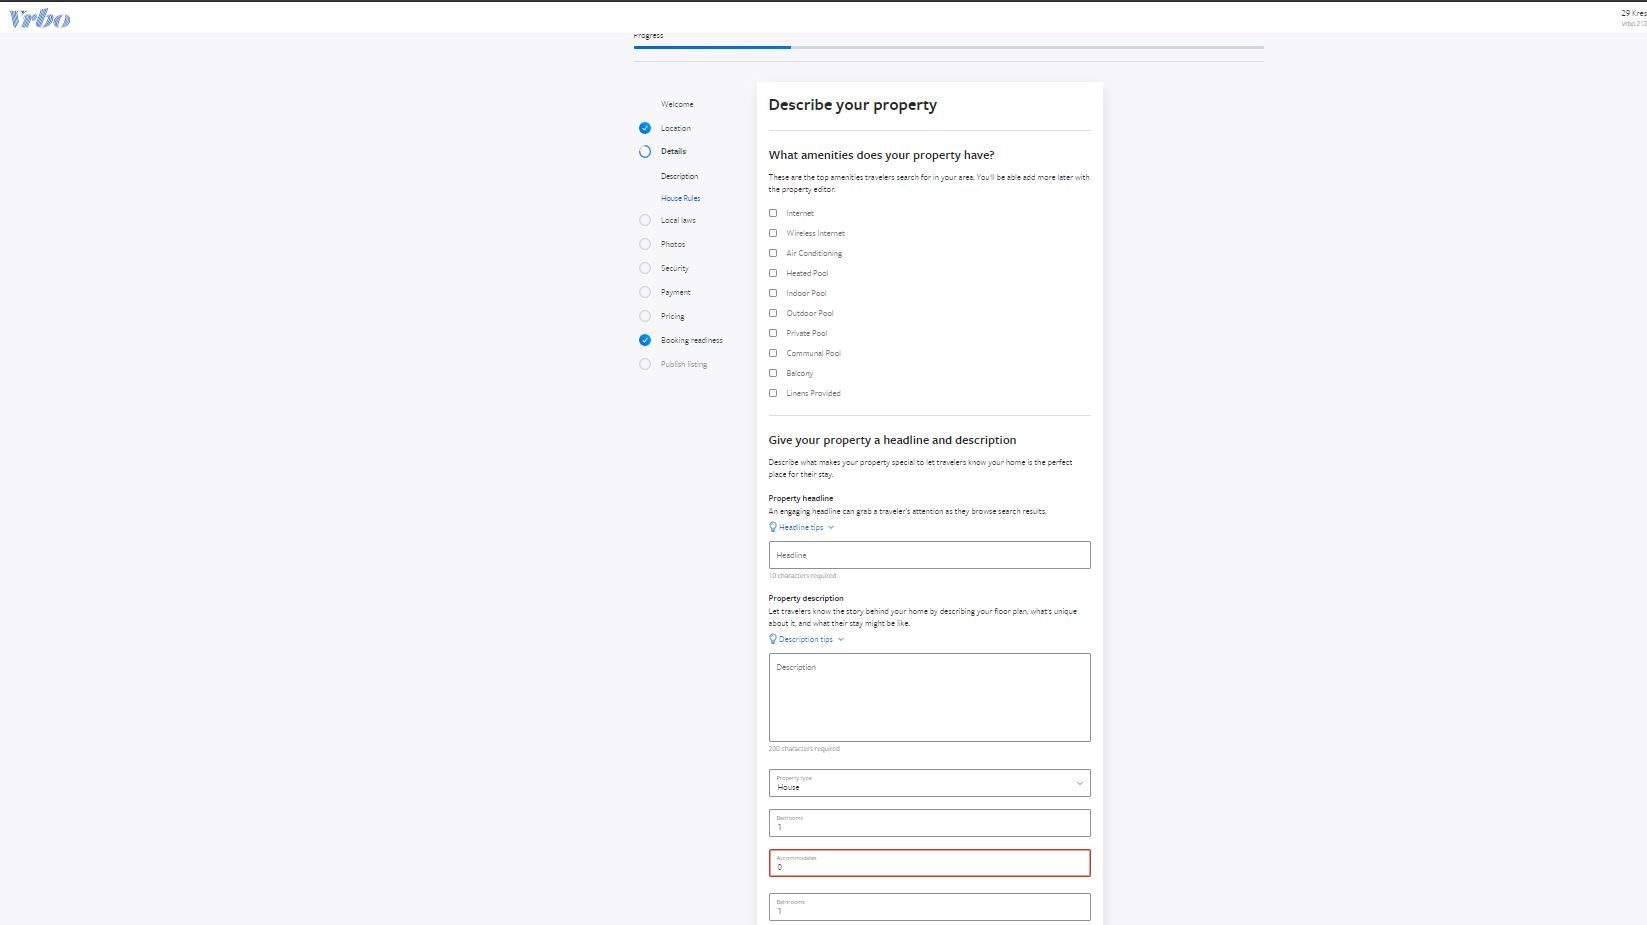
Set the house rules (maximum occupancy, minimum age requirement, and if you allow parties, children, pets, and smoking). You can also add short notes.

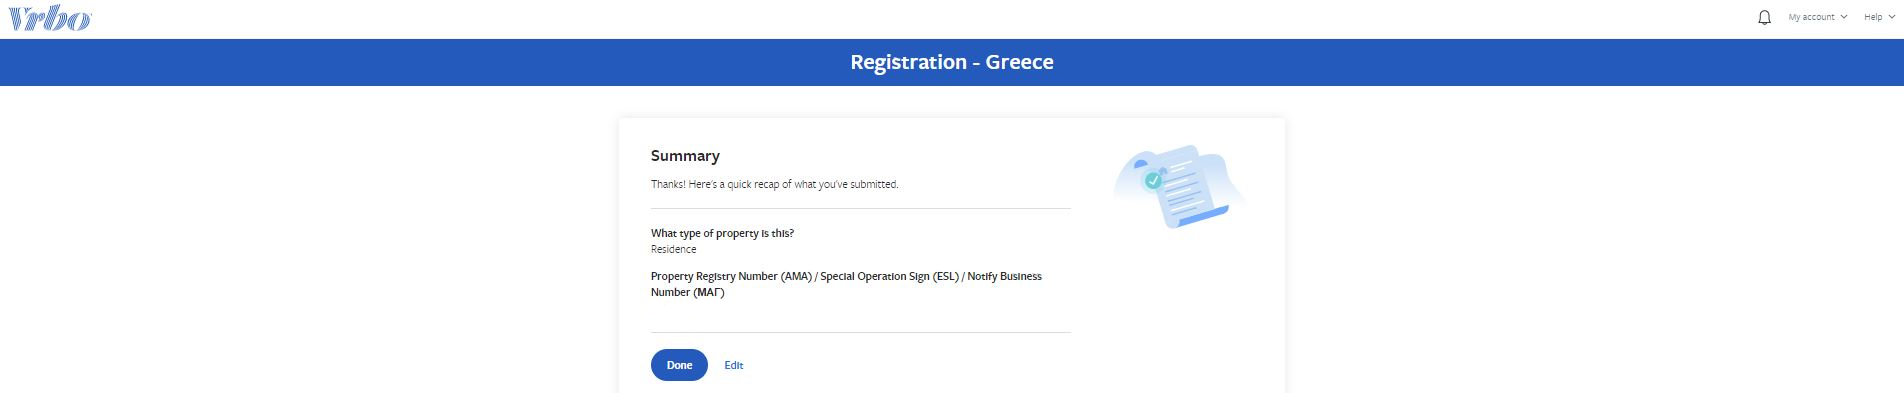
STEP 3: Local Laws
There are different taxation requirements depending on your property’s location, make sure to “visit the local laws page”. This step might not be needed in some countries.

If you see this summary, you are on the right track!
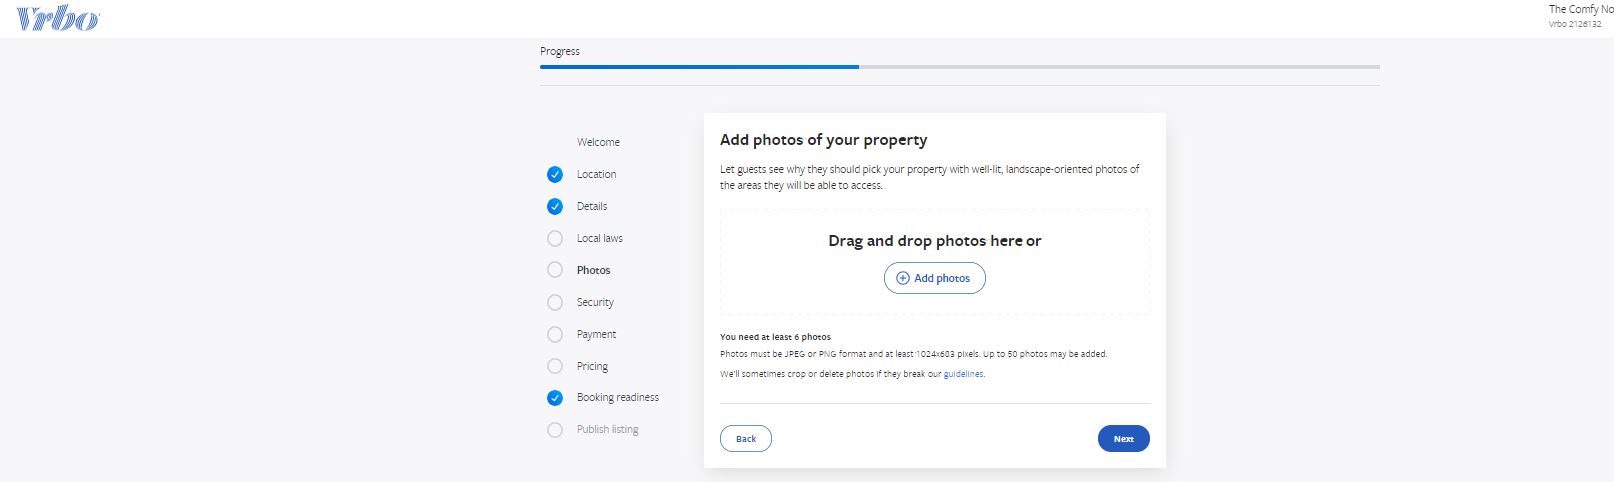
STEP 4: Add great-looking photos
You need to provide at least 6 photos to publish your listing and can add (later) up to 24. The minimum dimensions are 1920×1080.
Including photos of all the spaces a guest can use (i.e. living room, bedrooms, bathrooms, additional rooms) helps guests imagine staying at your place. It is also really important to choose the right profile photo (more on that in our article on building the perfect vacation rental listing). You can rearrange them and add short captions to add some personal touch.
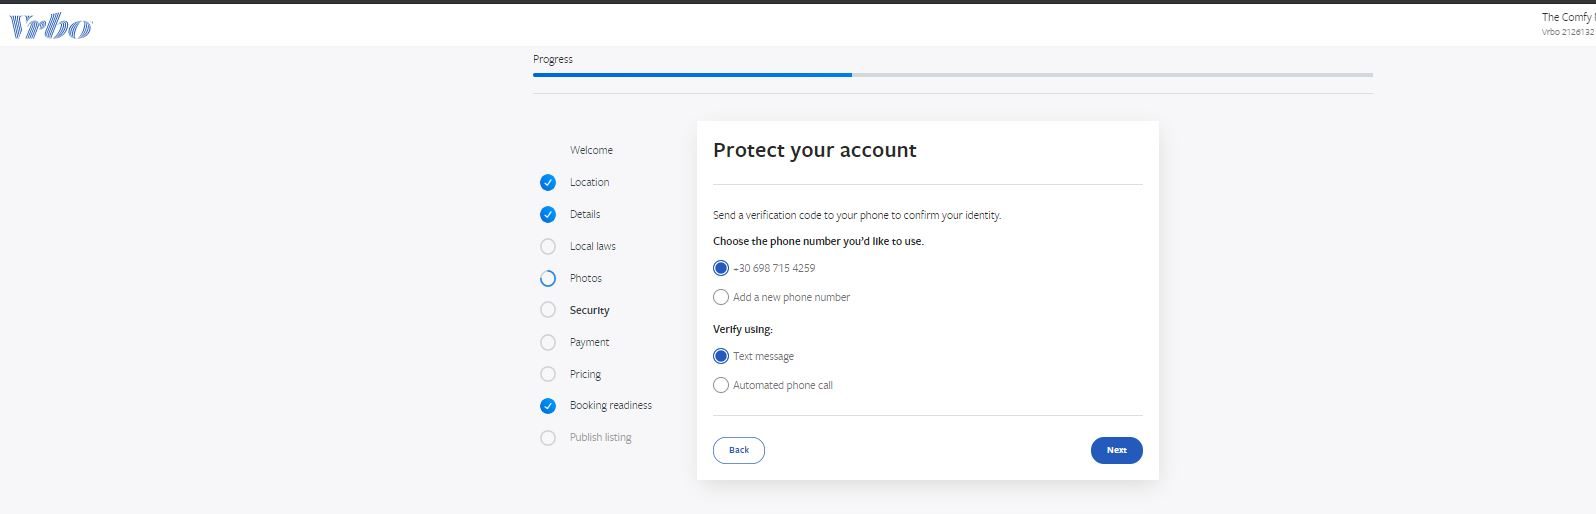
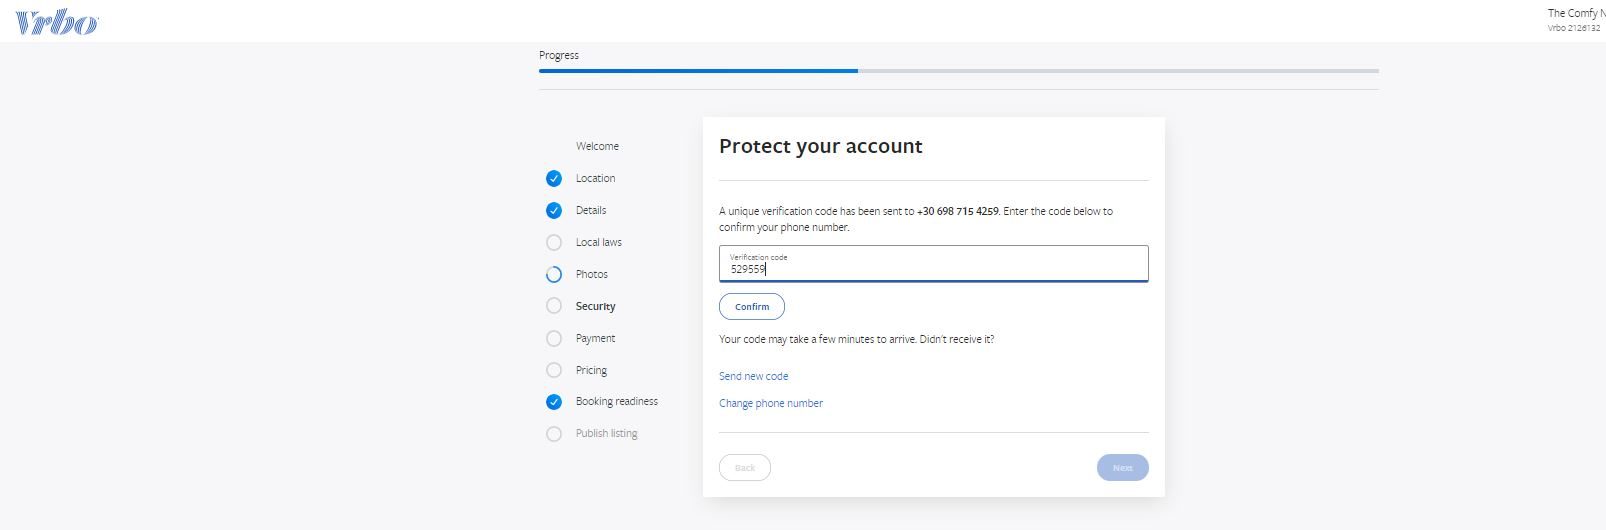
STEP 5: Protect your account
As Vrbo states, it’s easier than you think for someone to steal your password. Therefore, you will be prompted to send a verification code to your mobile phone in order to confirm your identity.
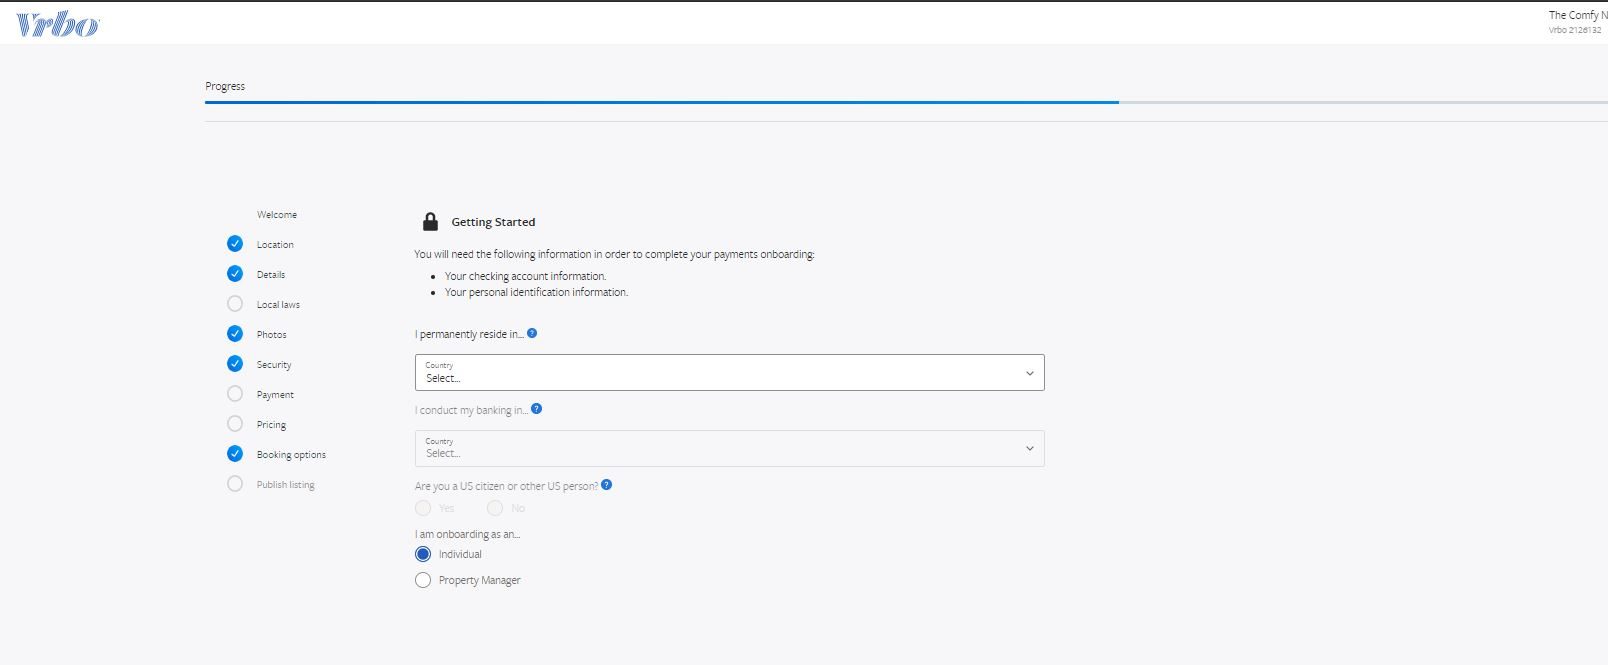
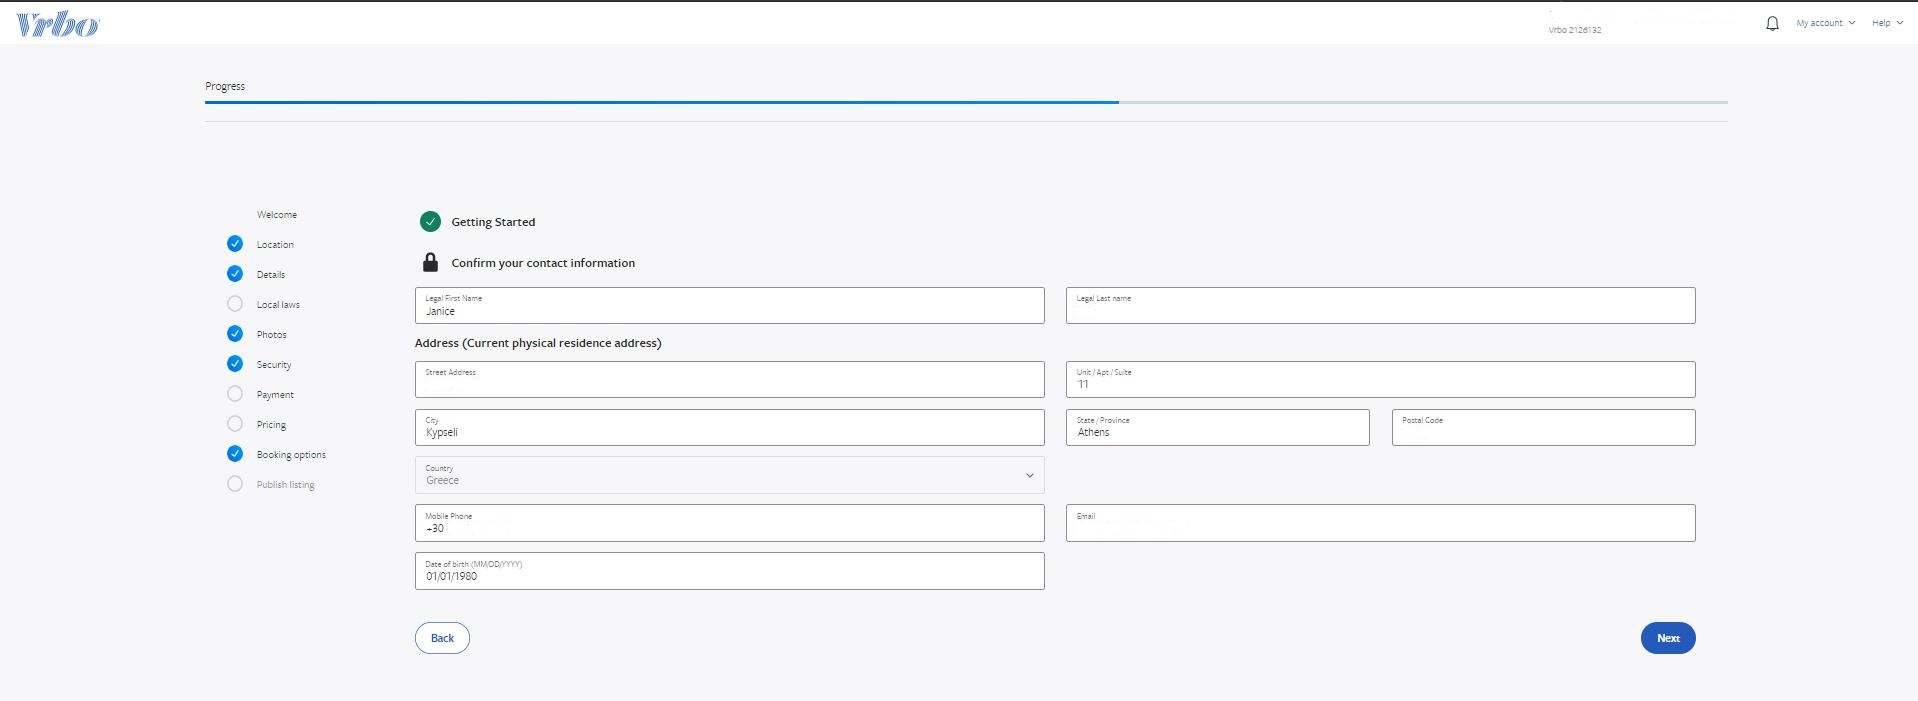
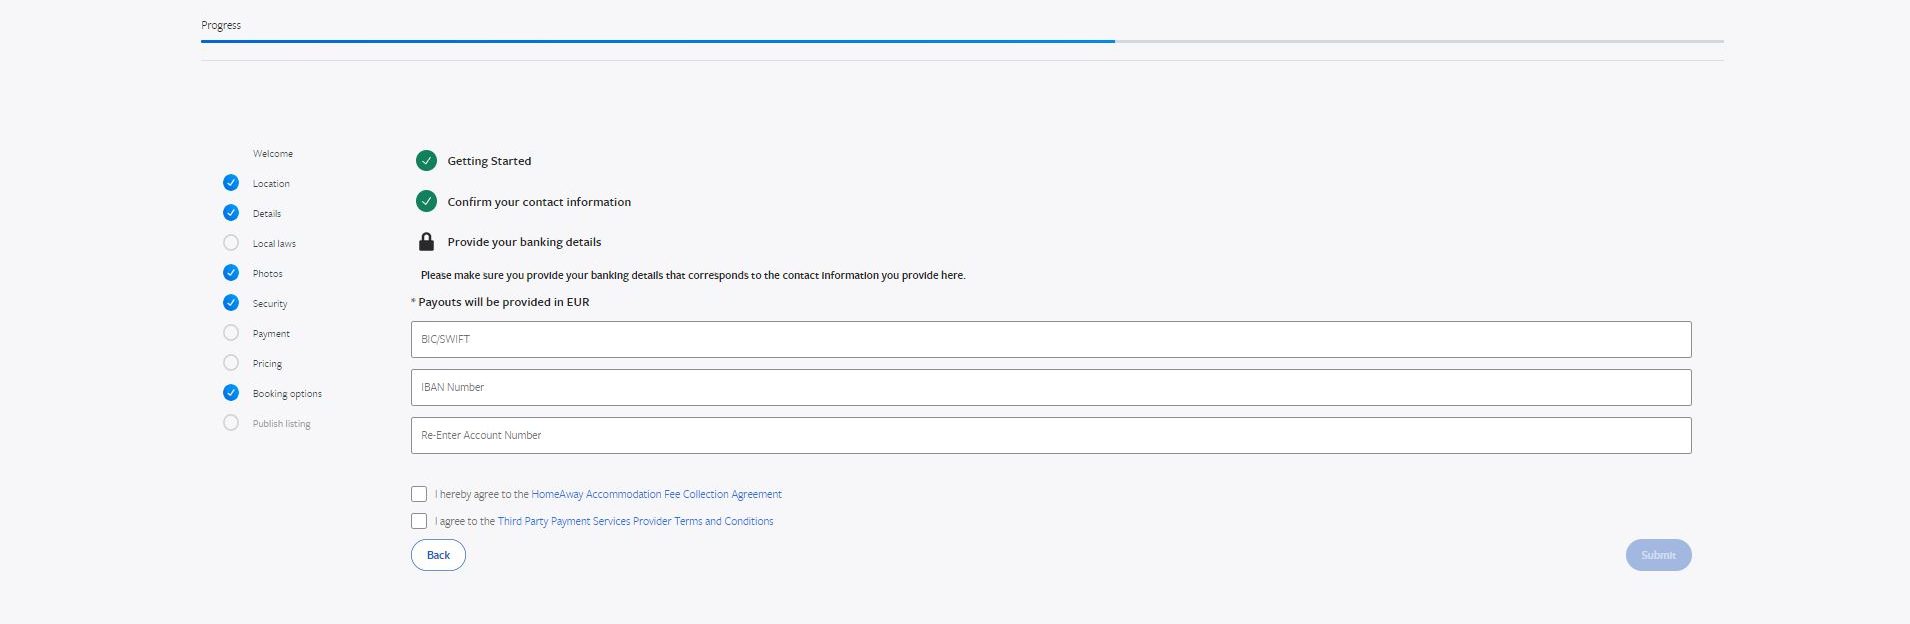
STEP 6: Set up your payment and banking details
In this section, you need to enter your role (Individual or Property Manager), your contact information (as far as banking is concerned), and your banking details.
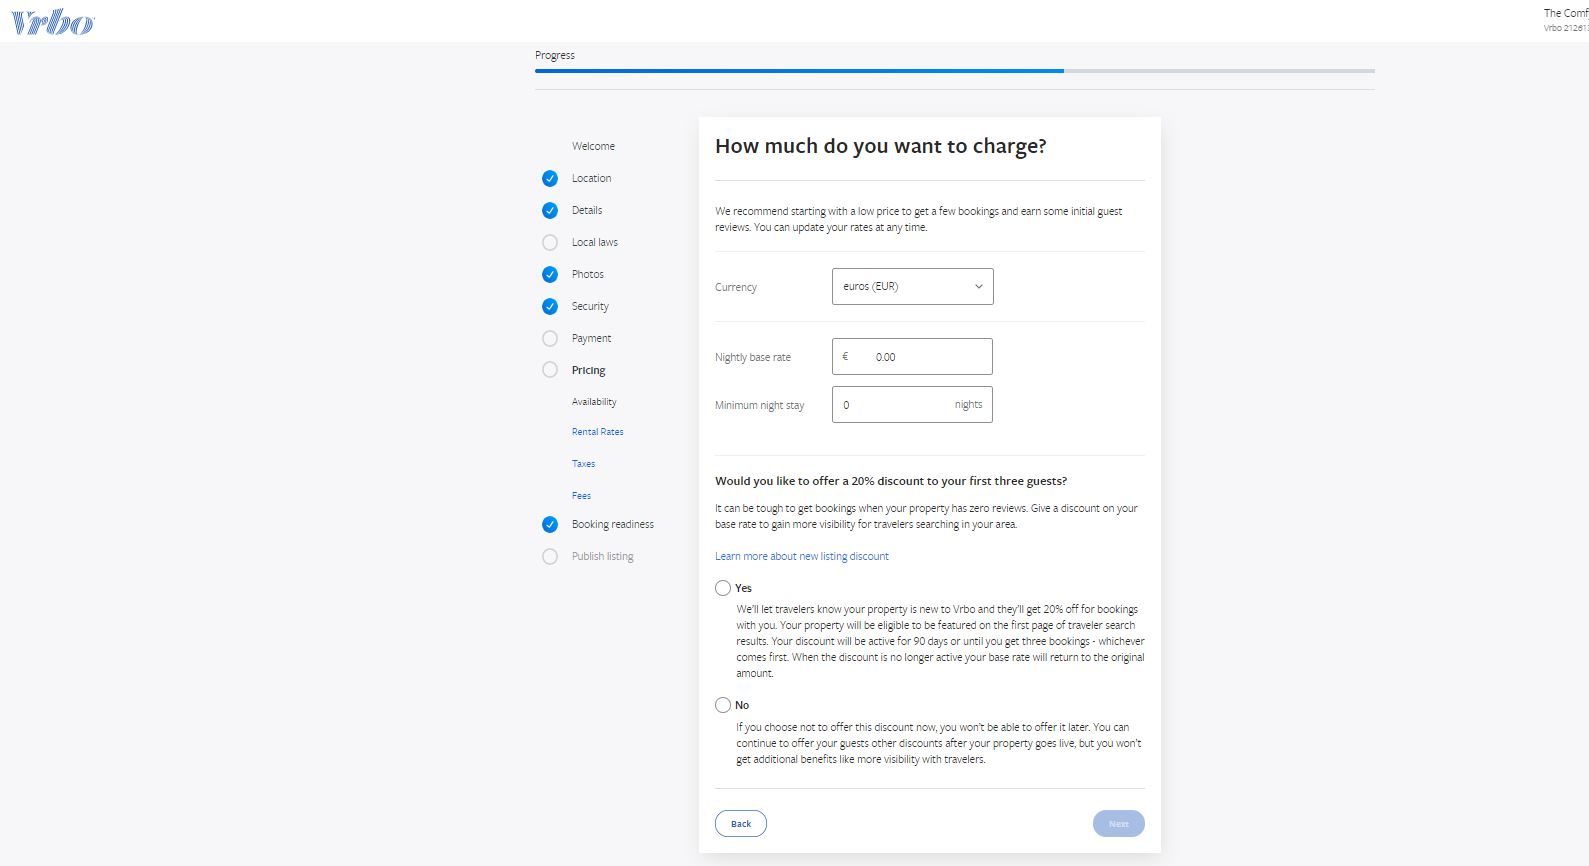
STEP 7: Set up your pricing
In this section, you set the availability, enter rates, taxes, and fees for your rental.
You can choose “full calendar availability” and block out dates that you don’t want to sell. Or “blocked calendar” where the dates will be closed by default and you will have to choose the dates that you wish to sell–it is best if you open only during summer or for a couple of months.

Vrbo recommends that you start with a low price to get a few bookings and earn some initial guest reviews. You can update your rates at any time.
A standard rate is recommended. You can also set rates for specific date ranges.
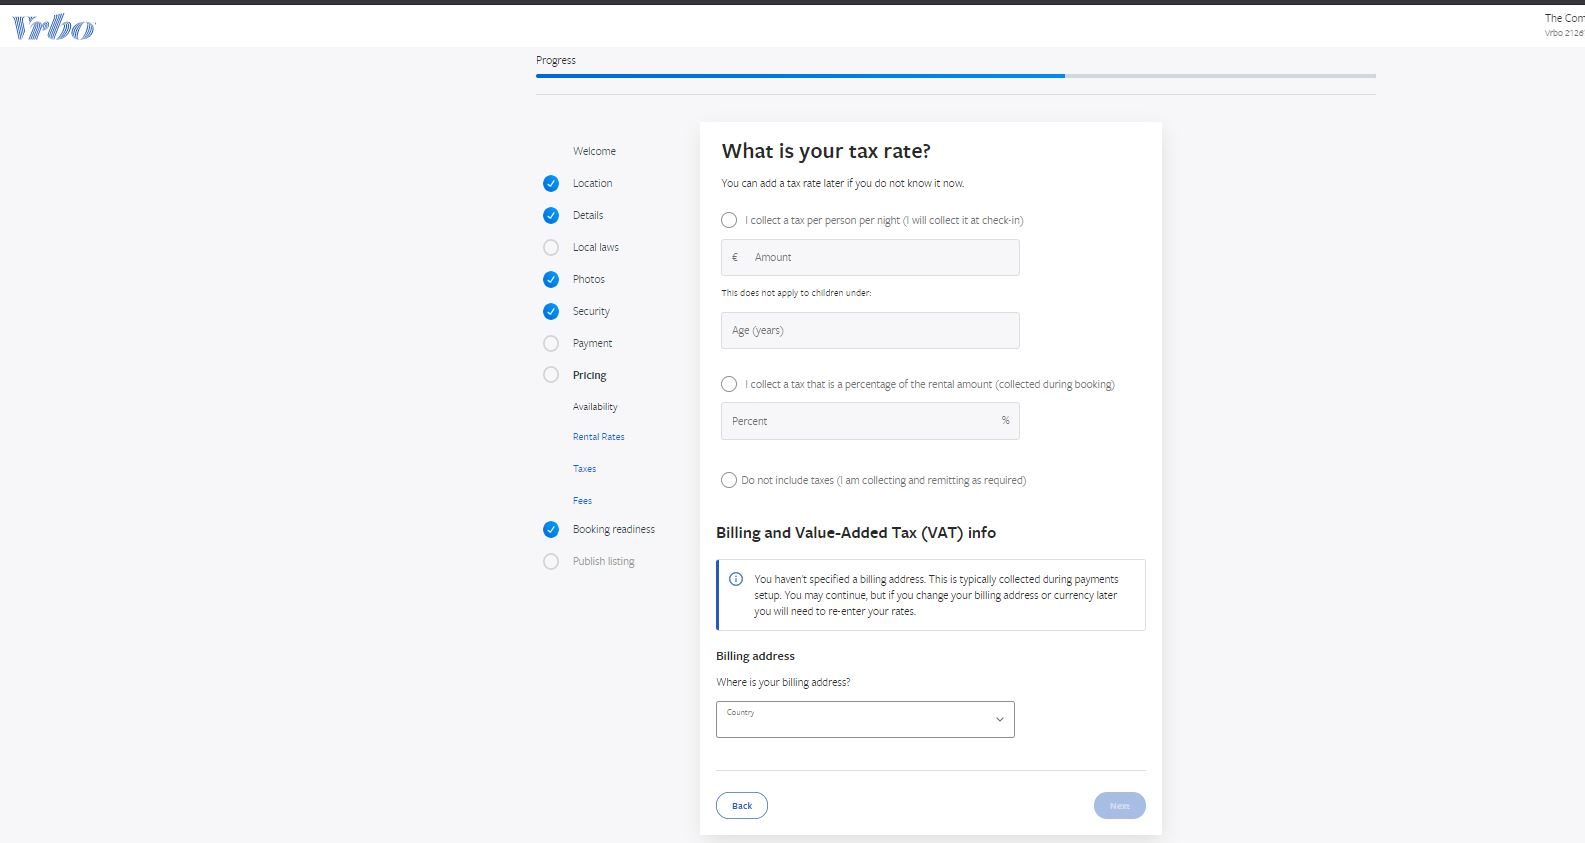
You have the option to add taxes or include them in the price. As advised by Vrbo, you need to follow all local rules, regulations, and tax requirements.
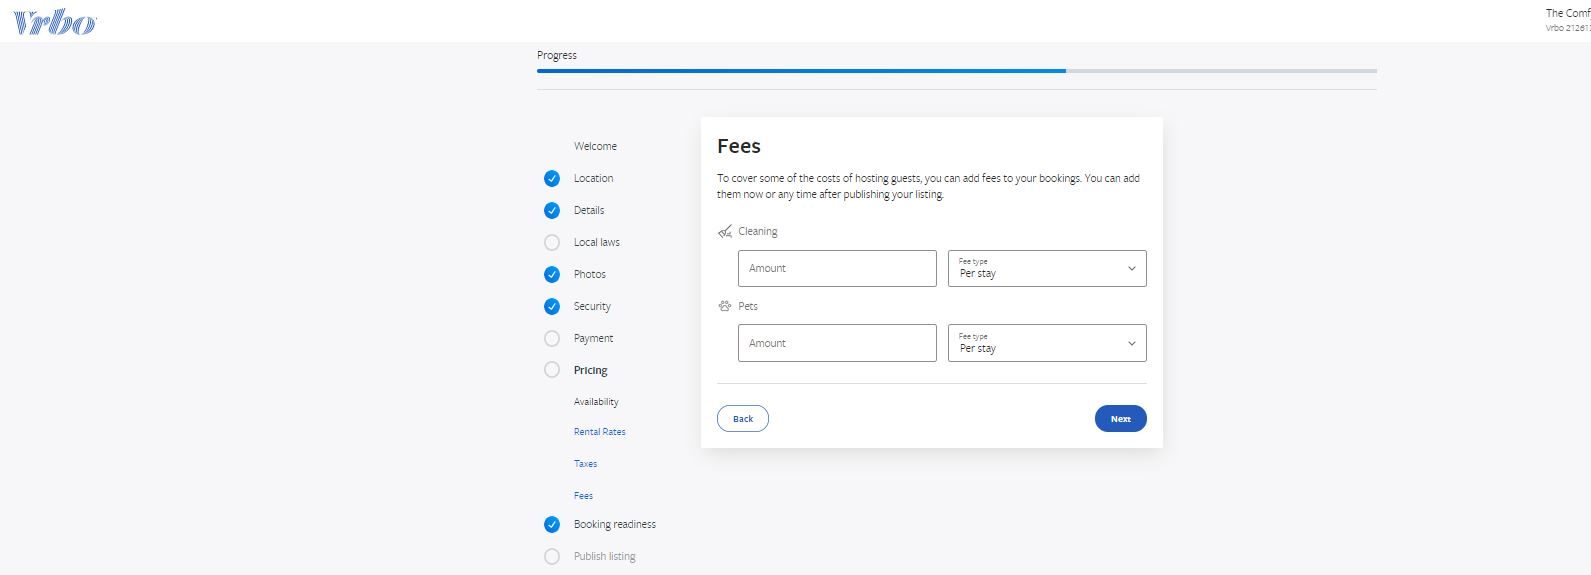
In this section, you can add also fees to your listing (i.e. Cleaning fee) and let travelers know if there are any other rules (i.e. whether pets are allowed or not).
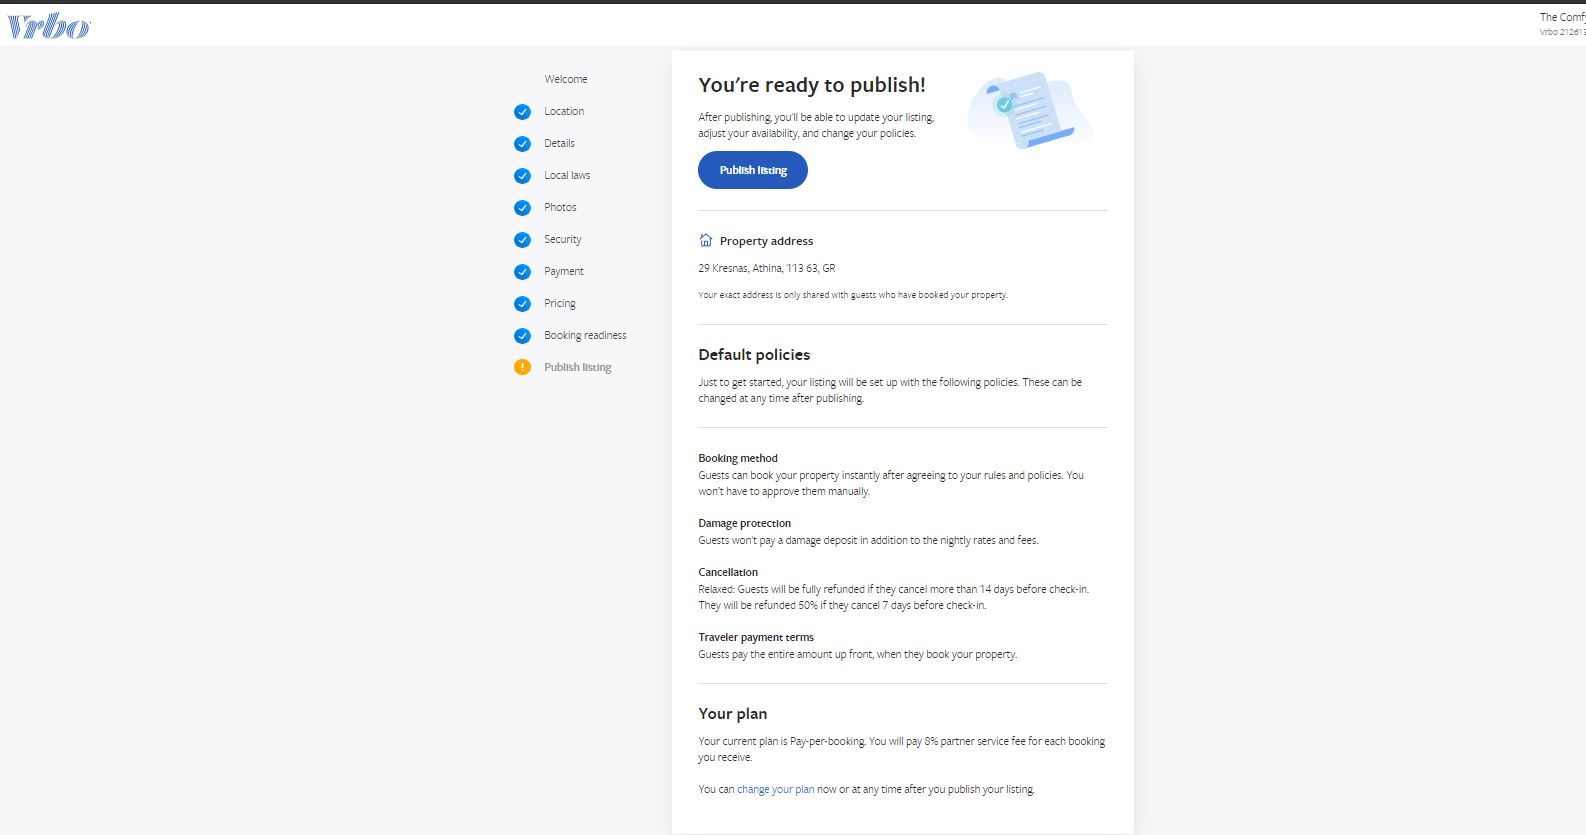
STEP 8: Final check if you are ready to receive bookings
You will be notified by email if someone books but you may also want to receive a text message.

Registering a permit to rent is a quick 3-step process.

If the payment method that you set on step 6 is successful, you will receive this screen.

STEP 9: Publish your listing
It takes between 24 and 48 hours from publishing a new listing to it being visible in search.
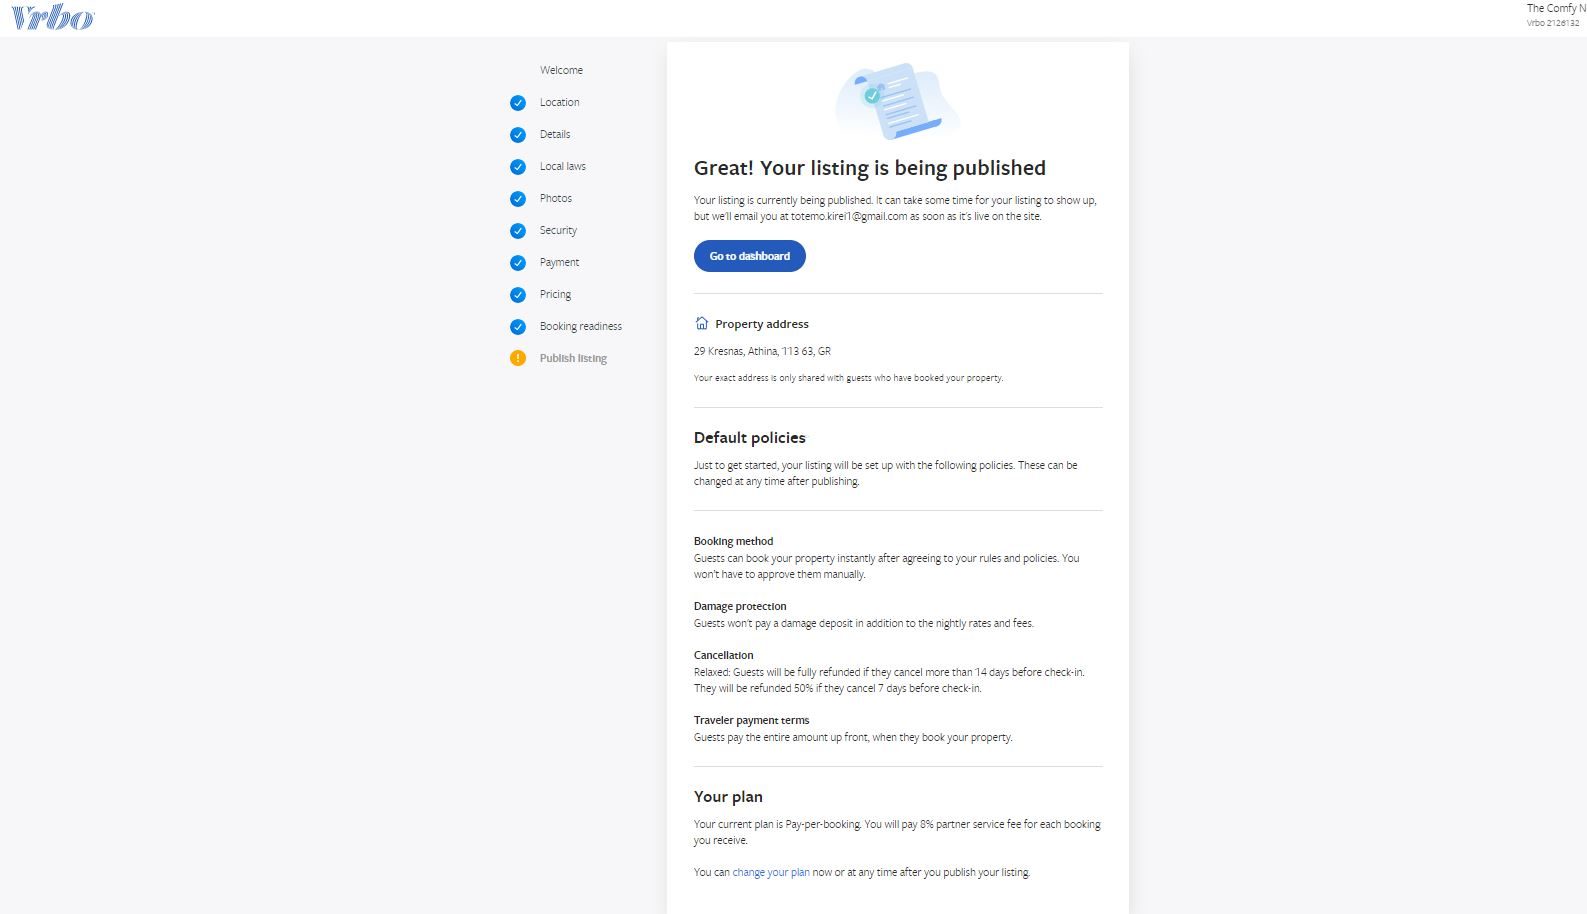
Congratulations! And while Vrbo is reviewing your listing…
You can do the following to further enhance your listing:
a) Change the default policies. From the owner’s dashboard, select a listing, click on a property, then rules and policies. Set the cancellation policy, check-in and out times, house rules, and rental agreement (if you wanted to upload your own), and booking type.

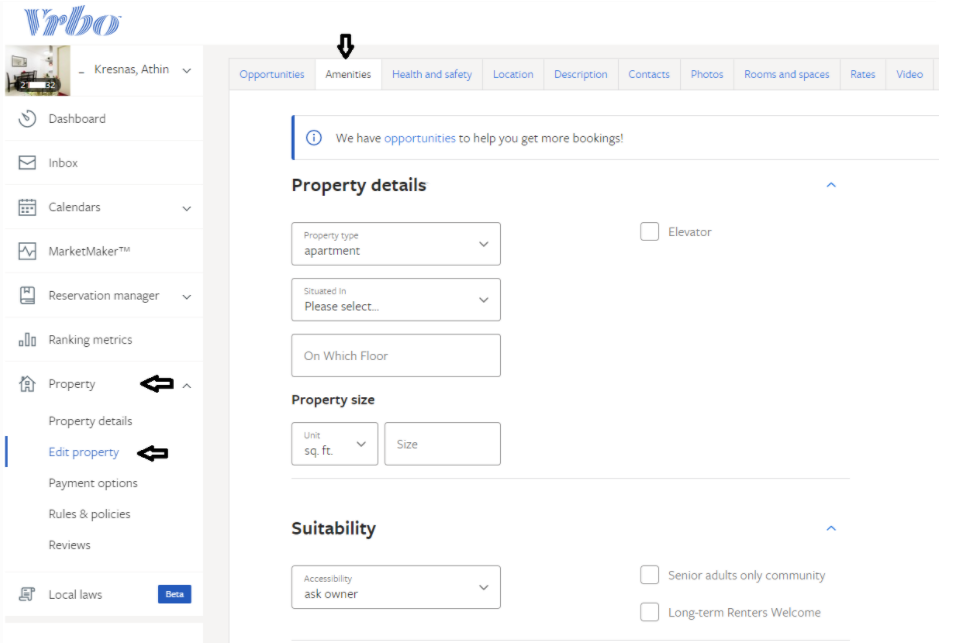
b.) Add all available amenities so travelers can find your property when they filter search results.
c) Show travelers a virtual tour of your property by adding a video to your listing. Simply record the video, upload it to YouTube™, and paste the video link.
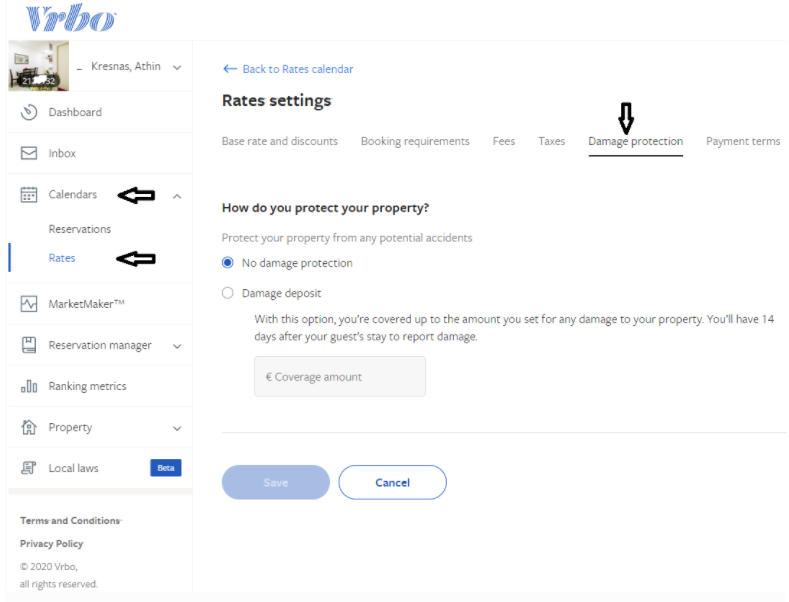
d) From calendar – rates, you can change the base rate and discount, booking requirement (minimum length of stay), fees, axes, damage protection (damage deposit), and payment terms (if you wanted the guest to pay in parts or in full upon reservation).
e) Add your listing details in multiple languages, including Danish, Dutch, Finnish, French, German, Italian, Norwegian, Portuguese, Spanish, and Swedish.
Finally, go to the Vrbo calendar and enter any blocked dates and/or reservations (confirmed or tentative).
Few days after publishing your listing, you will receive an email from Vrbo to comply with anti-fraud and sanction regulations, VRBO requires proof of identity (i.e. passport, driver’s license, or National ID), property ownership (such as a copy of the purchase agreement, deed, or tax bill) and an original gas, telephone, or other utility bills for the rental property dated within the last 3 months. As stated, this information is used solely for the purpose of identity verification and will not be sold or used for marketing purposes.
Congratulations! You now have created a listing on Vrbo!
All you need now is to keep your calendars synchronized across all your channels. The easiest way to do this is to use Hosthub’s Channel Manager and you’ll be synchronizing in no time!
If despite our guide above, you still want a professional to create your listing on Vrbo, we can help you there too. Hosthub offers a service that can copy your content from any vacation rental channel to any other, for a very reasonable fee. Visit our Revenue Booster page to find out more.
* If Expedia group identifies your Vrbo listing as eligible for the Expanded Distribution, it will be automatically shown to Expedia and other Expedia brands. Instant booking must be turned on to qualify. Not all Vrbo listings are being advertised to Expedia automatically because that depends on the eligibility of your property.